This is the sixth part in our series on building a dream home in Lake Tahoe. We’re following builder Peter Stromberg and going through the same steps he is taking, from inception to completion. I’ll be sharing pictures, tips and pointers so you can see what is involved and the beautiful outcome you can have!
Steps of Building a Home in Lake Tahoe
Step 1: This was covered in a previous article and I talked of locating the perfect lot. Once Peter had bought the lot in Montgomery Estates he started the permitting process.
Step 2: I covered the permitting process. It took Peter a bit longer in this stage than planned, but all moved forward.
Step 3: The house is being built on a uphill slope. I covered what was involved with pre-grade, TRPA site inspections and excavation.
Step 4: Once the foundation is completed a builder can then start the actual construction of a home.
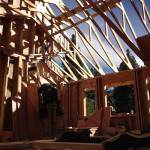
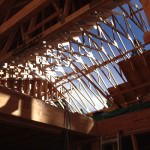
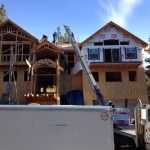
Step 5: We put in the slab and framed the house. Now, we’re on to Step 6 which is framing the roof and installing the sheeting.
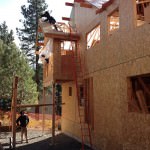
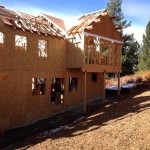
Step 6: The Roof, Exterior Sheeting (Sheer Wall), Interior Framing and Windows
At lot is covered in this step because we go from a lot of wood hammered together without the clear definition of the building to something that looks like a home! Different builders in different climates may complete the following tasks in a different order. In Lake Tahoe we have the weather to consider so getting the sides and the roof on are very important to complete before it snows.
The floors, walls, roof sheeting and windows are the focus of Step 6 because once they are completed Peter can work in rain, sleet or snow! In Lake Tahoe builders refer to this as “dried in.” This means the inside will remain dry for the winter and work can go all season. You can see the progress in the photos below:

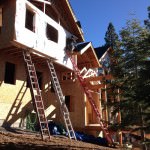
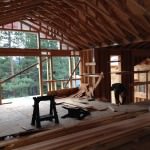

Installing the stairs now is important so the carpenters and other “subs” working can get from one floor to the other without ladders. Of course, some exterior work will always need a ladder.
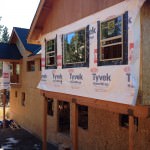
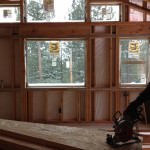
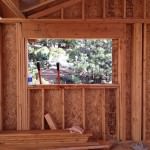
There are 50 windows in this home so you can imagine the labor and time that was involved!
Peter is staining all of the exterior siding inside the garage and that will be the next big push. He will install the siding after the stain is dry and the exterior is wrapped in a moisture barrier. The Tyvek house wrap is the white covering in the photos above.
Once construction is at this point the other “subs” can come in and do their rough-in work. Usually the sub contractors for this stage will be plumbing, heating and the electrical.
Step #7: Building the Entrance and Completing Exterior Siding

